The Official Ribbon-Cutting!

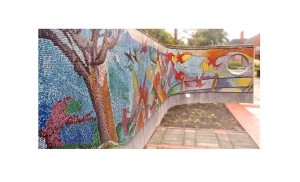
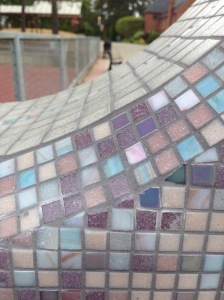
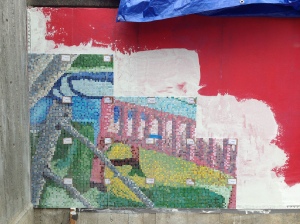
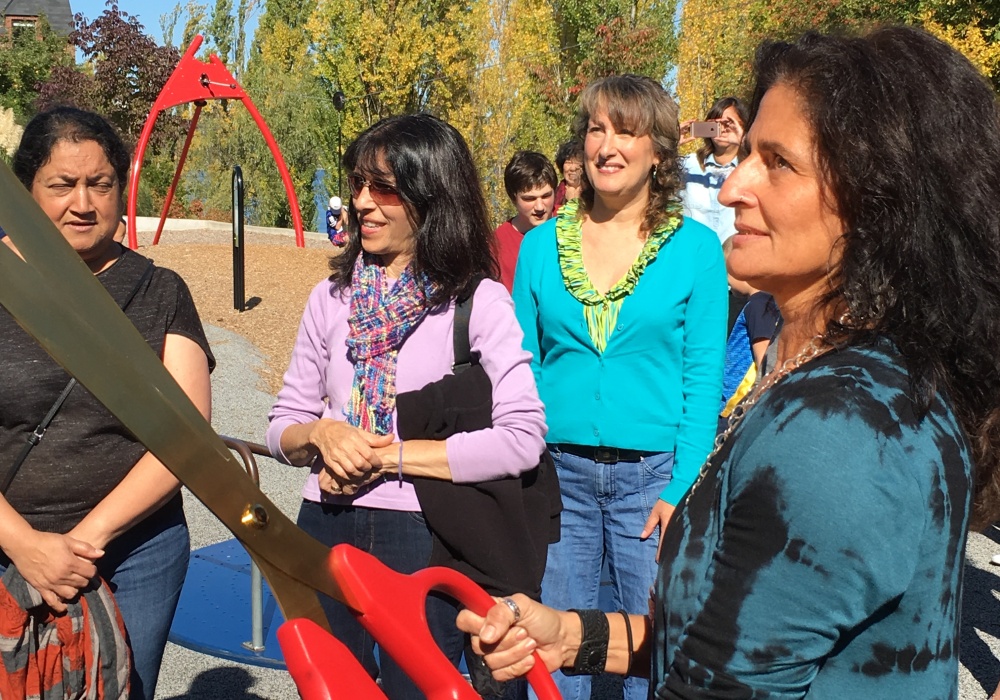
On Sunday, October 2nd, 2016 the official ribbon-cutting ceremony for the Luther Burbank Playground mosaics took place. The weather was beautiful and it was so wonderful to reunite with so many of the children, parents and volunteers that were such an integral part of this project. Together we created and installed nearly 250 square feet of mosaics in the Luther Burbank Park Playground.

We are grateful for the opportunity to create something beautiful for our community playground – Thank you to the Mercer Island Arts Council, and also to the Mercer Island Community Fund and a private donation that filled a gap when we decided to do more of the project with Mercer Island students.

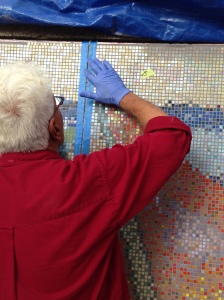
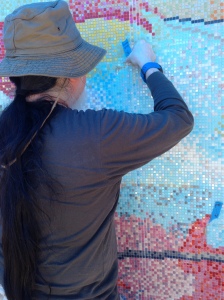
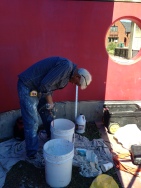
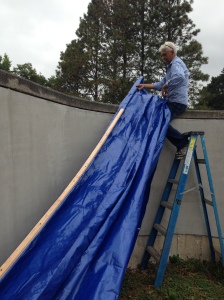
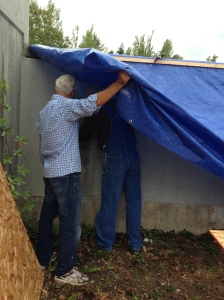
And a HUGE thank you to all the parents who volunteered in our workshops, the volunteers/friends who came to my home studio to help with behind-the-scenes preparation and volunteers who helped with the installation. A call-out to Carole for sharing Turkish coffee on those rainy June installation days — keeping as caffeinated! This project truly has been a community effort and we feel grateful for this opportunity that brought our team of 3rd – 8th grade students, MIHS teens and community volunteers together to create these mosaics!

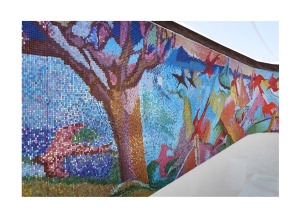
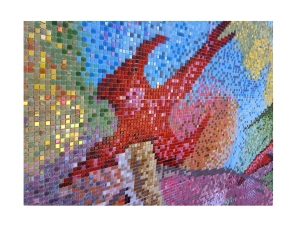
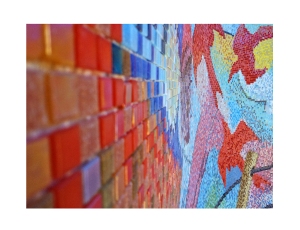
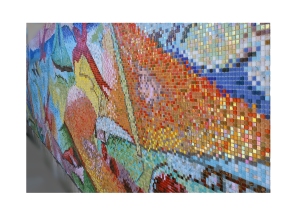
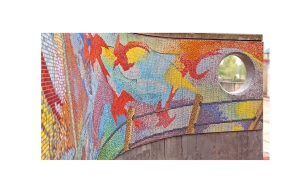
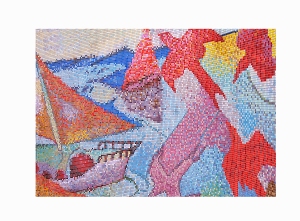
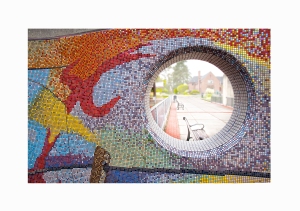
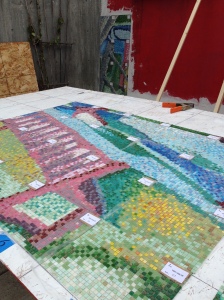
This mosaic “Birds in Flight” is 5 feet high and 38 feet long. Shown above are some preliminary sketches created by Jose Orantes.

It was so special to reunite with some of the creative and hardworking students that helped create the mosaics, now nearly a year older than when we first met.

Inspired by Mercer Island Students, Orantes’ Paintings Feature Island Scenes

It’s September and students are back in school, the weather is getting cooler and all the pieces of my  April 2014 proposal: Luther Burbank Playground Mosaic Enhancement have been accomplished.  The custom painting by José Orantes shimmers in the 38′ x 5′ mosaic mural and the mosaics created with students in our  workshops now enhance the playground. The project culminates with José Orantes “Birds in Flight” Artist Exhibition at the Mercer Gallery at the Mercer Island Community and Event Center from September 12 through October 28, 2016.


Gallery Opening Reception for José Orantes 
Thursday, September 15, 2016 from 6:30PM – 8:00PM
Mercer Gallery @ The Mercer Island Community and Event Center
8236 SE 24th Street, Mercer Island

Artwork is for sale with a percentage of the sales going to support arts and cultural programming of the Mercer Island Arts Council.
The framing of Jose Orantes’ paintings have also been supported by an Arts, Heritage and Preservation Grant from 4Culture.

Throughout this project, José Orantes has been painting in his studio. José’s series of new paintings for this gallery exhibit feature Mercer Island and PNW scenes created in his own artistic and whimsical style. Orantes found himself inspired by the Mercer Island students we worked with in our workshops. This inspiration, along with his talent and imagination captures the vitality of Mercer Island and the Pacific Northwest in vibrant colors.


José, Nancy and I were excited to see how the nearly 50 paintings and prints created by the artist filled the Mercer Gallery. We hope to see you at the reception this Thursday night, September 15th – 6:30 – 8 p.m. @ the Mercer Island Community and Event Center.


The Luther Burbank Playground Mosaic Art Enhancement proposed by Sandy Glass was funded by the Mercer Island Arts Council. The 3rd– 5th grade workshops, not fully funded in the grant received supplemental support by the Mercer Island Community Fund and also from a private donation to honor the memory of Aaron and Mickie Freed.  José Orantes is also grateful for a grant received by 4Culture to help frame his art for his gallery exhibition.


Mike Frey captures “Birds in Flight”

Josè Orantes and I have completed the installations of nearly 250 square feet of mosaics at the Luther Burbank Park Playground on Mercer Island!

One of the highlights of working in the playground for much of the Summer was meeting folks that stopped by as we were working. As we were installing the 5′ high x 38′ long mosaic installation above the playground, we had the pleasure of meeting professional photographer, Mike Frey.

Mike Frey has taken these fabulous images of the mosaic installation based on Josè Orantes’ painting. Please be sure to credit Mike Frey for these images. 

Pre-grout photos taken by photographer Mike Frey:

Post-grout photos by Mike Frey:

Thank you Mike Frey! We love how you’ve captured the detail, colors and beauty of the mosaic installation.

To see more of Mike Frey’s photos, check out his webpage:
mfreyimages.smugmug.com

Expansion Joints – Part 2

In an earlier blog post I mentioned my preoccupation with expansion joints. These thin vertical  joints in the mosaic are prepared by using 1/16″ pin striping tape and thin rope to designate clean lines that are filled with a flexible caulk (instead of grout) to allow for small amounts of movement within the concrete. 

Soon after grouting , the rope used to protect each vertical expansion joint line is carefully removed and the gap is filled with the flexible caulk. We have installed 9 of these expansion joints that are now filled with caulk and nearly impossible to see in the finished mosaic mural.

There are four caulked expansion joints in the part of the mural where a crack in the concrete was repaired by Joe McCarty (www.joetile.com). Can you see them? (I can’t.)


The final details! Finessing the Hole!

We’ve finished working on the mosaic mural of Jose Orantes painting “Birds in Flight.” Please bear with me as I share our last work sessions in which we focused on the details. 

Tiling around and within the concrete wall was challenging and took a long time. Jose and I created a plan for tiling the angled and curved surfaces. We introduced a neutral gray 3/4″ glass tile inside the circular space with one row of the 10mm tile running dow the center. This design filed the width of the surface perfectly.

Working together, Jose applied the thinset glass adhesive to the surface and I carefully placed the tile all around the inside surface of the cutout. Along the top (upside down), I took care to install smaller pieces of the mesh-backed tile to assure that they would adhere. On the angled curved surface rows of four tiles were sliced so that the outer row near the horizontal tiled wall could be separated a little. The following day, I needed to fine-tune our work. We know how important it is for opening to be strong and also finely finished to avoid sharp edges.


IMG_3413

For the horizontal plane to accommodate the circle cutout, nearly every tiny tile around the circumference needed to be cut on the appropriate angle. That was this detail-oriented artist’s challenge.


As you can imagine, many hours were spent working on this detail in the mural. The colors of 10mm tile used in the hole come from Jose’s design. He purposely incorporated a neutral area where the mural hit the hole. We used these tiles that got cut out within and around the hole!


I can’t mention enough how awesome our friends/volunteers are. Thank you Heather, Nancy, Bonni, Sari and Carole for your help with the hole and the final details!

Looks Like Magic…

José Orantes and I have continued the installation process of the mosaic mural for seven full work days since my last post. Most days we’ve met at playground at 7AM and spend about 45 minutes setting up our tarp canopies, organizing our tools and materials and making a plan for our day. These past few days, José has been grouting the parts that are ready and I’ve been doing the detail work. For folks that come by the wall once a week, our (slow,  persistent) progress looks like magic. That’s just an illusion 🙂

The park is quiet early in the morning. This installation is feet away from the storage room that houses electricity and access to a water hose. It’s also right near the restrooms. The tarp tent feels like a home and provides shade. I’m sure I’ll miss the mornings working here in the playground. We’ve also had the opportunity to chat with folks that walk through the playground during these quiet times. We’re touched by their compliments of the mural-in-progress. It’s so nice seeing Janice Engvall who I knew from when my kids were a Lakeridge, walk by each morning with her husband. This week she said “I walk by every day and now instead of seeing the concrete, I’m watching the wall evolve into beautiful artwork!” 

Here are some photos that illustrate our progress:

Thanks also to some of our friends who stopped by to volunteer this week. Here are a few captured at work. Thanks also to Bonni, Sari and Kathy!

In my next post, I’ll share some details about the detail work. Thanks for checking in.

Another Mosaic Monday

We hadn’t taken a photograph of our end of week progress on Friday. In those five days of installing (José and I each worked over 40 hours!) we installed over 100 square feet of the mosaic mural (with care). 


Our Monday (Day 6) began with set up: unpacking the supplies, laying down canvas tarps, rigging up our canopy to create shade and setting out the tiled panels on our gridded table. Work today included installing mosaics on the curve in the concrete wall. It was quite challenging to cut and maneuver the stainless steel Schluter to follow the curve, remain straight and close to the wall. José is a Schluter expert!

As we continue to install the beautiful tiled mosaic, there’s still detail work that needs attention. Thanks so much to Anu and Sari who helped us today. Thanks also to An for bringing by rags. 


Installing Tiled Mosaic Mural: Days 3-5

IMG_3214

Mixing thinset

Wednesday through Friday have been sunny, dry, and warm. We’re grateful for the tarp canopy that provides some shade while we continue to install the tiled mosaic mural at Luther Burbank Park.

The dry warm and sometimes breezy weather causes the thinset to dry faster. José makes small batches so that our adhesive doesn’t dry out before we are able to install the panels of mosaics. 


Making progress on the mosaic mural

Day 3: By the end of the third day of installing, we’re able to see Jose’s painting coming together in the tiled mural! We start at the bottom (E) and move up in a stepping pattern, taking care to maintain the 1/16″ spacing between tiles and using a small level to assure that the vertical and horizontal lines remain plumb.


Installing Expansion Joints 

In addition to painting a coat of RedGard® on the wall, we’re installing expansion joints to prevent damage from cracks in the concrete.The rope is removed after grouting. The space is then filled with a flexible caulking instead of grout to allow for expansion due to small cracks in the concrete.


The mural continues to grow…

We continue to install about 35 -40 square feet each day during days 4 and 5 (8/11 and 8/12). Whew! Thank you to Carole for working with us on Thursday and for talking us to Master Wholesalers to buy more thinset in “Beastie” and to Libby for helping out on Friday. 

We’re taking the weekend off but will be back
at 7AM on Monday!
♦♦♦

Installing Tiled Mosaic Mural: Days 1 & 2

José Orantes and I are back at the Luther Burbank Park playground installing mosaics on the 5′ high x 38′ long concrete wall. Here’s the progress we’ve made on Monday and today working from 7 AM – 3PM.


~ Day 1 ~

1. Build Tarp Canopy for our workspace 

Materials:
~ 16’ x 20’ tarp (cut into two to 8’ x 20’ lengths)
~ Four bar clamps to attach to the top of the concrete wall
~ Eight 1” x 2” wood strips to create structure.
~ Canvas drop cloth (9’ x 12’ cut to 4.5’ x 9’) to cover ground

2. Paint the wall with Red Guard to reduce cracking

We applied a coat of RedGard® to provide a flexible barrier between the concrete and the mosaic installation as a precaution to reduce the effects of cracks in the concrete. We’ll also be install several expansion joints in the affected area and every eight feet as recommended by tile experts.

Materials:
~ 3.5 gallons of RedGard®
~ Rollers and extension rod
~ Paint pan and disposible liner
~ Tape to protect surfaces


Day 2

Another busy work day that included lots of measuring and remeasuring, creating a gridded prep table to set out our tiled mosaic art in position before installation, installing stainless steel schluter edging and beginning to install the mural.

1. Create Tile Prep Table

Our prep/set-up table is carefully measured, gridded and labeled to hold our mosaic panels in position before installing them onto the concrete wall. Numbers along the top are marked on blue tape so that we can update the columns as we move across the wall in our installation process. The letters A, B, C, D, E represent placement from top to bottom.

Materials:
~ Three work horses to hold plywood table
~ plywood cut and assembled to fit 5′ x 7′ of mosaics
~ Roller and paint pan
~ Primer
~ Ruler, pencils and Sharpie markers

2. Installing Schluter and mosaics!

We’re feeling brave! 

We’ll be back again tomorrow at 7AM.

Preparing to install the tiled mosaic

The to-scale painting that José Orantes created over 9 months ago has been enlarged and reproduced onto mosaic mesh using 10mm (1/4″) glass tiles instead of paint. The 12.5″ squares of glass tile adhered to mosaic mesh was sent to me via UPS! It was so exciting and mind boggling to receive ten boxes, each weighing approximately 30 pounds, knowing that when installed on the 5′ high by 38′ long concrete wall in Luther Burbank Park (above the playground), the mural will come to life in a tiled, pixelated impressionistic work of art.

See how the “A3” tiled square matches up to its designated square on the “road map”?
José and I are thrilled with the range of colors used to recreate the painting.
Some are even iridescent! 


~ Building in Longevity ~

Expansion Joints:
expansion joint
We’ll install expansion joints every eight feet to protect the mural from movement that can occur within the concrete over time. This image (http://www.poolspanews.com/how-to/design-construction/special-report-glass-tile_o) illustrates how expansion joints between the rows of tile is created by placing a flexible sealant where grout normally would go. The flexible filler should absorb stress and allow space for the tile to expand and shift without cracking.

We will paint a coat of Custom Building Products’ Red Guard on the concrete substrate prior to installing the mesh-backed tile as an additional precaution to prevent cracking.


Creating a tarp canopy:

Before we begin our work to install the mosaic mural, José has conceived a design for a tent that will shield our installation, materials and us (!) from the sun. We’ll attach a tarp to the top of the concrete wall using four bar clamps. 1″ x 2″ wooden strips will be built into the tarp to provide structure. While we work, the tent will provide shade.

When we are done working for the day, the tarps will be released so that our work-in-progress will be protected.

Materials:
– 16’ x 20’ tarp (we will cut it to 8’ x 20’
–  4 bar clamps to attach to the top of the concrete wall
–  1” x 2” wood strips to create structure.

I’m continuing to develop a checklist detailing the process and the supplies we need to bring to the site so we don’t forget anything. Here were go!